Showing posts with label recipes. Show all posts

Monday, March 25, 2013

Cauliflower Pizza Crust


I've been gluten free for about 18 months now, and there are very few gluten-filled foods that I miss.  Pasta?  Never liked it.  Bagels?  Feels like lead in my stomach now.  Bread?  Well, ok I miss some kinds of bread.  But pizza?  I have never tried to deny my love for pizza.  The truth is, gluten free versions can never come close to that crisp on the bottom but doughy as you bite in and pull the slice away from your mouth sensation that good brick oven pizza brings into your life.  

I love choosing my toppings and enjoying a taste of each in every bite.  

Pizza can be casual or cozy. 

It is one of the most comforting one-dish meals.  

And it can also be one of the most unhealthy indulgences.

Never having mastered a good gluten free flour-based crust, I decided to try a cauliflower version, and I have to say I am in love with the results!  This is all fresh, made from scratch, and took me less than an hour from the moment I stepped into the kitchen to the moment I took my first bite.

Cauliflower Pizza Crust

yield 4 servings

Ingredients:

about 1/2 head of cauliflower
1 egg, beaten
1 cup grated Parmesan cheese
2 tsp basil or Italian seasoning

Procedure:
1.  Preheat the oven to 400 degrees and prepare your baking sheet.  I used a cookie sheet lined with parchment paper, but you may also use a pizza stone or a well-greased cookie sheet.
2.  Rice the cauliflower and then steam in the microwave for 8 minutes.  To rice, pulse the cauliflower in a food processor or a blender until it resembles the size and texture of grains of rice.  Option for microwave free cooking: Steam cauliflower florets in a steamer basket first, then rice them.  If you choose to steam first be mindful that you don't overprocess the cauliflower as it will rice more quickly.
3.  Mix the cooked riced cauliflower with the other ingredients in a large bowl.  The mixture should stick together a bit but will not come together like a traditional dough.
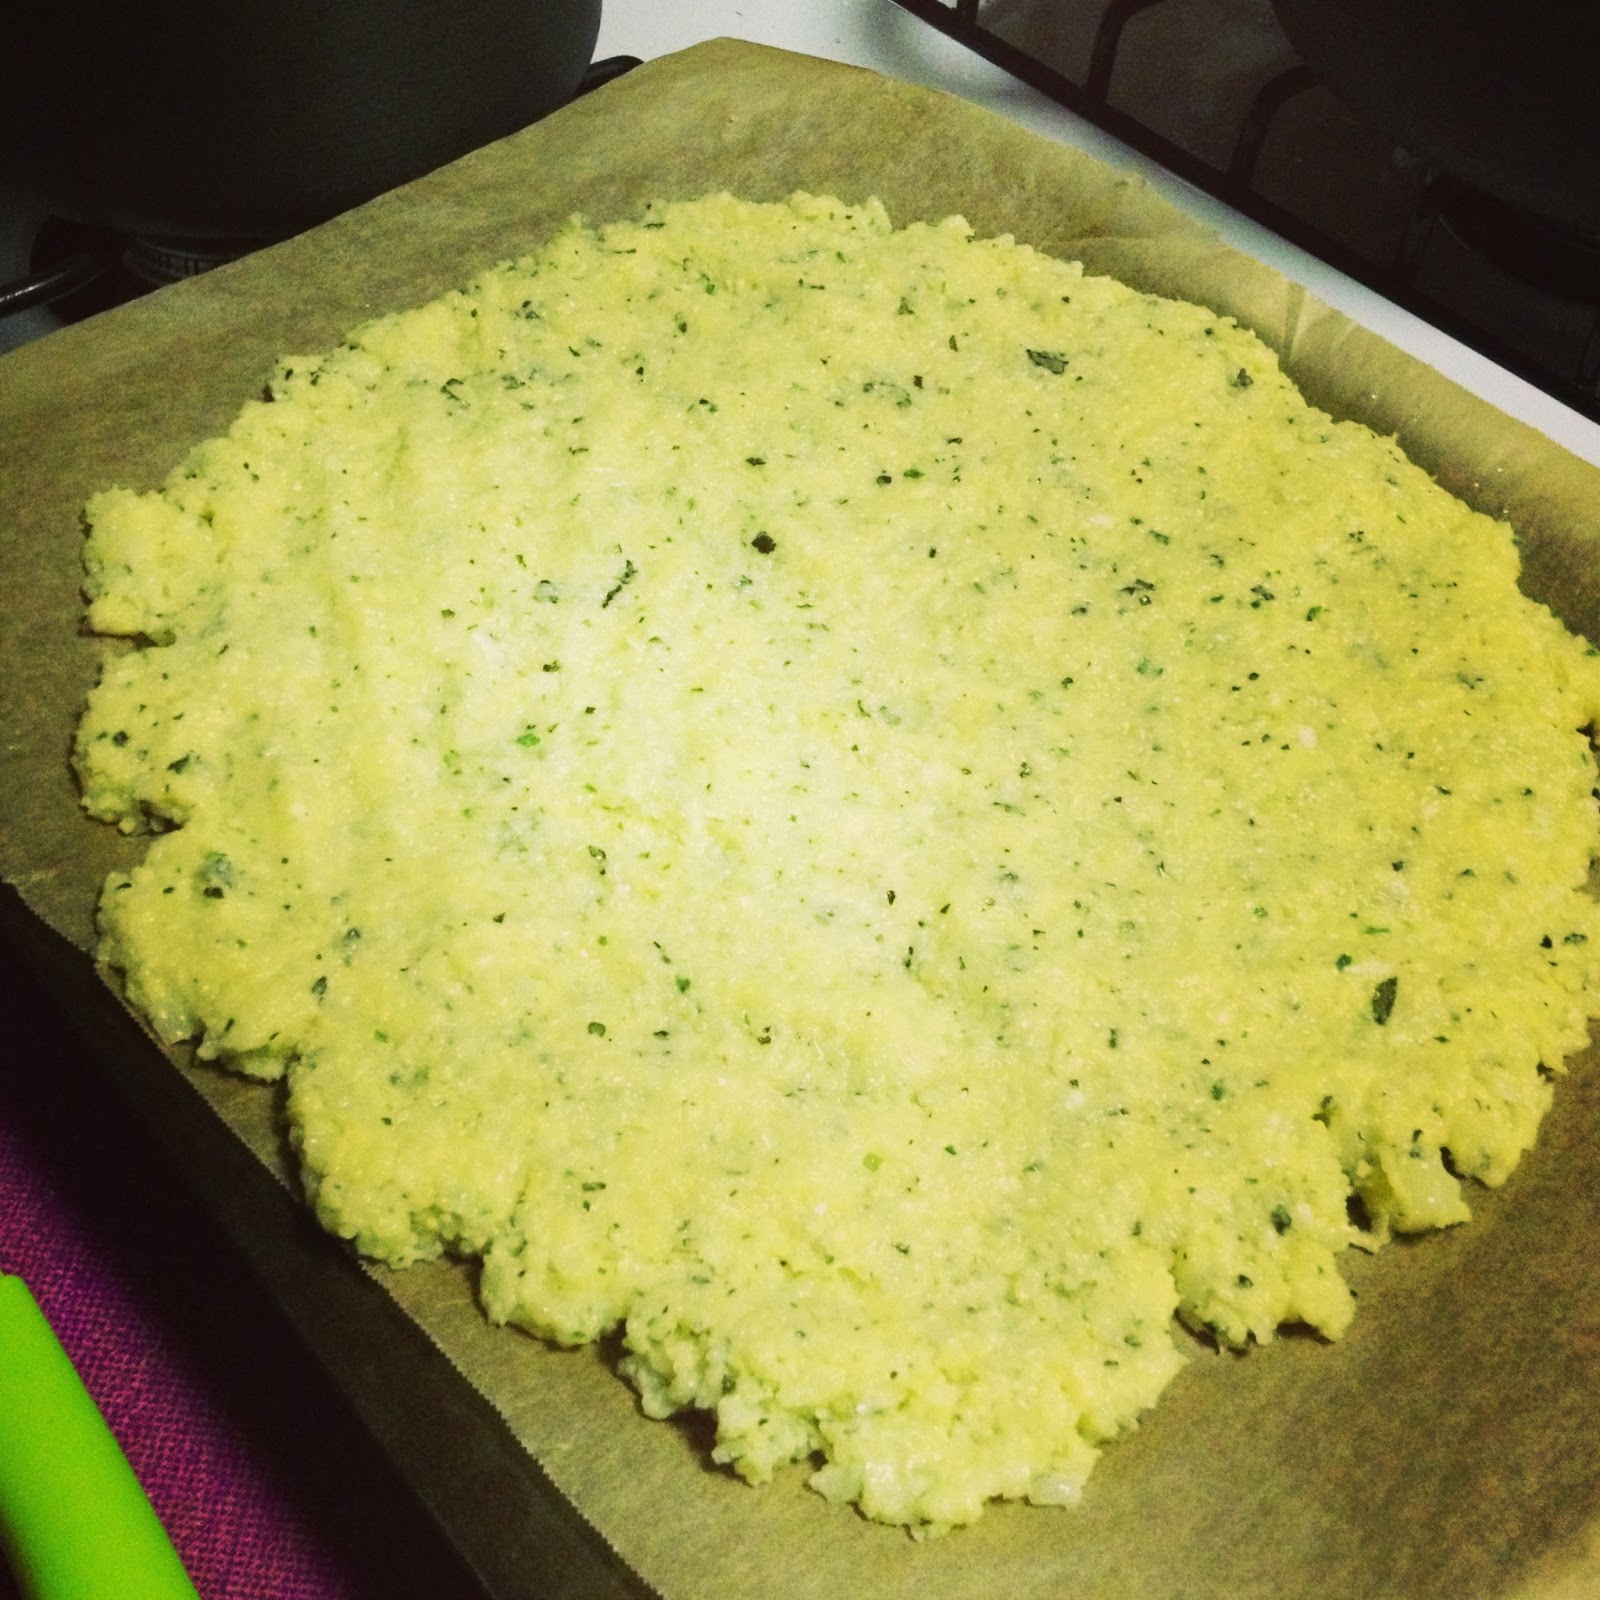
4.  Place the crust mixture onto the baking sheet and form into a pizza shape, about 1/4-1/2 inch thick.
5.  Bake for 25-30 min until golden brown.
6.  Remove crust from oven and add your toppings.  Return pizza to the oven and heat until cheese is melted and toppings are heated through or browned, about 5 minutes.
A note on toppings:  Remember that this crust is not as gluey and sticky as a traditional pizza crust, so choose lighter toppings.  You will not need much cheese due to the Parmesan in the crust.  You may wish to choose toppings that are already cooked or require less cooking time because they will only be in the oven for a few minutes.  I chose a homemade tomato sauce, mixed greens, black olives, and a little fresh mozzarella. 

Enjoy your gluten and grain free pizza!

Wednesday, October 24, 2012

Gluten Free Banana Peanut Butter Cupcake Win!


When you look at this photo, you may think, "Hmm, it looks like that frosting was just slapped onto those poor cupcakes."


If you thought that you would be correct.  I don't believe in skimping on frosting, and these batches were especially thick and delicious.

Yesterday I posted about improv cooking, which is a show that frequently plays in my kitchen.  More often than not, it gets rave reviews.  Improv baking, on the other hand, is a much more dangerous game.  However, it is a game from which I will never back down.  You see, like most creative individuals, I often have a very specific picture in my head of what I want to achieve, but quite a nebulous plan to achieve my desired result. I'm rarely satisfied with any one recipe I can find, so I simply improvise.  I have been improvising more and more since going gluten free, and my successes are so very sweet.  Like this one:  Banana Peanut Butter Cupcakes!  There's chocolate cupcake in the picture too, but we won't mention those.  I actually followed a recipe for them and was not thrilled with the result.  Banana Peanut Butter though, OMG.  I could die right now.

I should mention that I did not make these cupcakes purely for my own pleasure.  My little sister turned 22 this weekend, and she decided to celebrate her birthday by running the Atlantic City Marathon.  She finished in just over four hours (4:02) and placed 19th in her age class.  A performance like that surely deserves some protein and potassium in the form of a delicious miniature cake.  Don't you agree?

Here's what I made for her (more or less)

Banana Peanut Butter Cupcakes
makes 12 cupcakes

2 cups all purpose gluten free flour (I like Bob's Red Mill)
2 tsp baking powder
1/4 tsp baking soda
1/4 tsp guar gum
2/3 cup sugar
2 mashed bananas
1/4 cup applesauce
1/2 - 1 cup peanut butter (sorry, I did not measure.  It was probably closer to a cup)
1/2 cup hot water

Wisk together dry ingredients.  Mix in wet ingredients and beat until smooth.  Fill a lined cupcake tin and bake at 325 degrees for 22 minutes.  Perfection.

Oh, what's that?  You noticed that these cupcakes are vegan?  Yes, yes they are.

Hmm?  What did you say?  That's right.  The only fat comes from the peanut butter.

And yes, they have a fabulous moist crumb.  Honestly, if I did not know they were gluten free I would never have guessed.  My sweets-spurning boyfriend even ate two.

Now vegan frosting?  No,  no, that will not happen in my kitchen.  I have tried to make vegan buttercream with coconut oil, and it was a total bust.  I love coconut oil in other things, but not on top of my cupcakes.  I frosted half of these with a cinnamon honey buttercream and the other half with a dark chocolate buttercream.  Sorry, no real recipe for those.  Buttercream is stupidly simple:  beat a bit of confectioner's sugar and  your flavoring into a softened stick of butter.  Continue to beat and slowly add sugar until your mixture tastes like frosting instead of butter.  Done.  No excuses to ruin these babies with canned frosting.  Happy Birthday and Congratulations on your awesome marathon time, Sarah!

Wednesday, October 20, 2010

Pumpkin Pie

For me pumpkin pie is completely hit or miss.  I've had some that was not so good and some that was great.  Given my recent obsession with roasting pumpkins, it is only natural that I'd attempt to make my own pie, even though I've never done it before.  I started off by roasting two small sugar pumpkins (why make one pie when you can make two?) and pureeing the flesh in a food processor.  I modified this recipe from Spiced Pumpkin Pie from allrecipes.com to create this healthy, delicious desert.  I didn't know pumpkin pie could be this good...I am never using canned pumpkin again.  The quantities I've given are for two pies, so just half them for one pie.  Most of the substitutions I made were purely due to availability (I ran out of pumpkin pie spice and I forgot to buy brown sugar) except for the milk--I am lactose intolerant, and the almond milk worked well.


Spiced Pumpkin Pie
makes 2
 4 cups pumpkin puree
1 cup egg substitute
3/4 cup sugar
1/4 cup molasses
1 tablespoon pumpkin pie spice
1 tablespoon Chinese five spice powder
12 fluid ounces of almond milk
2 9 inch unbaked pie crusts

1.  Preheat oven to 35o degrees Fahrenheit.  
2.  In a medium bowl mix together the pumpkin, egg subsitute, sugar, molasses, spices, and almond milk.
3.  Pour half of the pumpkin pie mixture into each of the pie crusts.  Bake in the preheated oven for about 80 minutes, or until a knife inserted in the middle comes out clean.

The five spice powder gives it an interesting complexity.  If you use evaporated milk like the original recipe calls for, you may want to double the amount because it is so much thicker than almond milk.  Try the recipe and let me know what you think!

Thursday, October 14, 2010

Bottoms Up, Charlie Brown!

Ok, I've gotta stop with the "It's the Great Pumpkin, Charlie Brown" references that no one outside of my own head will understand.  Last week I read a ravelry post about making your own pumpkin infused vodka.  Given my recent obsession with sugar pumpkins and the fact that I have enjoyed many a home-infused fruity vodka in my time, a fire was lit under me in no time.  I had to make my own pumpkin vodka.  Luckily I also had the perfect pumpkin-loving vodka-swilling partner in crime, so we set out to mix up our concoction last Friday night.  Want to spice up your Halloween or Thanksgiving with your own version of the Great Pumpkin Martini (geez, there I go again...)?  Here's what we did:


Pumpkin Vodka
Materials:  
1 Qt. Mason Jar (any jar that seals will work--food safe seal not necessary.  We're not canning here, people.  Besides, doesn't alcohol kill germs?)  
2.5 C triple distilled vodka
.75 C vanilla triple distilled vodka
2 cinnamon sticks
2 split vanilla bean pods or a dash or two of vanilla extract
1 sugar pumpkin, no larger than 3 lbs
cheesecloth or coffee filter for straining

Procedure:
1.  Cut your pumpkin in half and scoop out the guts.  Check out Elana's Pantry for a fabulous hand-holding photo tutorial on how to do this.   This time I had four hands rather than two to hack open the pumpkin, but that didn't make it much easier.
2.  Roast the pumpkin in a 350 degree oven for about 10-15 minutes, just long enough to get the raw taste out. 
3.  After the pumpkin cools, cut it into wedges.  Stuff the wedges in your mason jar along with the cinnamon and vanilla.  You may not be able to fit the whole pumpkin in just yet. 
4.  Add the vodka.  As the ingredients settle add more pumpkin if you still have some left over.  Add more vodka in the previously stated proportions as desired.  Fill that jar up!
5.  Seal the jar and store in a cool dark place (we have ours in the fridge) for 2-4 weeks.  The more natural your ingredients (aka vanilla bean pods instead of extract) the longer it will take for the flavors to seep out and flavor the liquor.
6.  Move the jar around daily to make sure all of the vodka touches the pumpkin.
7.  Strain the liquid through your cheesecloth or coffee filter.
8.  Mix up a pumpkin pie martini and enjoy!


I'm not linking a Pumpkin Pie martini recipe because I can't find one I like.  Who needs heavy cream in their liquor?  Yuck, not me!  I'll get back to you after I've personally sampled and crafted the perfect drink.

Thursday, September 23, 2010

It's the Great Pumpkin!

Despite my mother's warning, I was determined to cook a whole pumpkin for...well, for something.  After a little recipe searching and asking some ravelry peeps for advice, I decided on a Caribbean Pumpkin Black Bean Soup.  Now I can't find the recipe I liked best so I am going to make up my own, and of course I'll share it with you all!  But before we get to that, let me tell you a little bit about how I turned a whole fresh pumpkin into about 2.5 cups of fresh puree. 

Thanks to Elana's Pantry, I was confident about conquering and chopping up my little (actually a little too big) sugar pumpkin.  After all, I just have to cut it in half, clean out the seeds and pulp, and roast each half in a pan filled with a quarter inch of water.  No biggie.  I've peeled awkwardly shaped raw butternut squashs with a giant knife and gingerly shaved the prickly skin off of countless slippery pineapples with the same giant knife.  Well, maybe my giant knife wasn't quite sharp enough, because cutting a pumpkin in half, even a small one, is hard!  I'd rank it up there somewhere with giving yourself a bikini wax (awkward and painful) and giving a screaming cat a flea bath (simply put, hell in a bathtub).  My knife actually got stuck in the top of the pumpkin like a scene from a horror movie!  Too bad I didn't get a picture of that...when I finally separated the pumpkin halves I let out an audible sigh of relief.

Cleaning out the pumpkin was no biggie.  Of course I saved my seeds for roasting.  Squeezing the slimey pulp through my fingers used to be (ok, still is) my favorite part of carving Jack-O-Lanterns.  I managed to refrain from doing that today, but  mostly because I didn't want to get any slime on my nice sweater.  Mental note:  get an apron.  After 45 minutes in a 350 degree oven, I had this:


Pumpkin seeds gently flavored with my favorite Pampered Chef Sweet and Smoky Barbeque Rub, and a beautiful roasted pumpkin! 

Close up of my delicious roast pumpkin flesh
And the soup my pumpkin became:

Caribbean Pumpkin Black Bean Soup

3 cups of pumpkin puree or roasted pumpkin (to be blended later)
2 cups vegetable broth
2 15 oz cans of diced tomatoes with green chiles
2 sweet onions, chopped
1 red bell pepper, chopped
3 carrots, chopped
2 teaspoon cumin
2 teaspoons chili powder
2 Tablespoons minced ginger
1 15 oz can of light coconut milk
1 15 oz can of black beans, drained and well rinsed
salt and black pepper to taste

1.  Heat oil in soup pot.  Add onions, carrots, and cumin.  Saute until slightly softened.  Add pumpkin, ginger, coconut milk, 1 can of tomatoes (if  you will not be using an immersion blender add both cans of tomatoes now), chili powder, and vegetable broth.  Heat through.  Use immersion blender to blend the soup until it is about 80% liquified.  Blending is optional, but recommended if you are using whole roasted pumpkin.  Add black beans and second can of tomatoes (if not already added).  Bring to a boil and season to taste. 

Wednesday, March 24, 2010

Sinful Chocolate Truffles


Last night my wrists needed a break from knitting, so I decided to use the Ghiradelli chocolate I've been hoarding since February to make truffles. I intended to make these for Valentine's Day, but as I was single this year and suffering from from a wicked wisdom tooth infection that week, I wasn't feeling especially motivated to cook, bake, or eat much of anything. Now my mouth is healed and in need of chocolate, and it seemed like the perfect time to get cookin'

I haven't made truffles in about 3 years, and I can't recall where I found my last recipe, so a little googling led me to a
Joy of Baking article where I learned that truffles were intended to look like actual truffle mushrooms in the dirt. That's not especially appetizing, but it made me feel better about the organic, non-uniform shape of my truffles. Even when I use a melon baller to shape them they come out looking slightly misshapen.
This time I made three different flavors, almond, mint, and raspberry. Yum!


Here is what I did, adapted from a Ghiradelli and Food Network recipe:
Ghiradelli Sinful Chocolate Truffles
Ingredients
1/3 C Milk
7 Tbsp Butter
1 C Semi-Sweet Ghiradelli Chocolate Chips
1C Bittersweet Ghiradelli Chocolate Chips
1 tsp mint extract (optional)
2 Tbsp Chambord (optional)
1/4 C Raw Almonds (optional)
1/3 C Dark Chocolate cocoa powder

1. Combine milk and butter in a saucepan over low heat. Stir often and heat to boiling.
2. Toast raw almonds in a dry pan over high heat. Pay close attention, as they can burn very quickly. You will know they are done as soon as you can smell them. I find that toasting nuts really brings out the flavor.
3. Pulverize toasted almonds in a food processor (I used my little Magic Bullet). Set them aside.
4. Pour boiling milk mixture over chocolate chips in a mixing bowl. Stir to combine and melt chocolate. You may need to microwave the mixture for a very short period of time to get all the lumps out.
5. At this point I divided the chocolate mixture into three different bowls and flavored each separately. The above measurements for mint extract, Chambord, and the almonds are approximate. I didn't actually measure anything; I flavored each mixture to taste. Be sure to reserve some almonds for coating the truffles.
6. Set your chocolate mixtures aside to harden. About thirty minutes in the refrigerator did the trick for me.
7. Dip a melon baller in a glass of warm water and scoop out balls of each chocolate mixture. Drop the balls into a small bowl or lipped plate of coating. I coated the almond mixture in the finely chopped almonds and the mint and raspberry mixtures in dark chocolate cocoa powder. You may wish to clean your tools in between flavors. This is the messiest yet most fun part of the process.
8. I store the truffles in a wax paper-coated container in the refridgerator. That is, if there are any leftovers.

If I use this recipe again, I think I will use cream instead of a mixture of butter and milk. These candies tasted great to everyone else, but I would do something differently next time. I dislike buttery chocolate, and I tasted the butter especially in the almond truffles. I don't usually keep cream or even half and half in the house, but I suppose it would be worth buying for this recipe. Actually, maybe next time I will try using silken tofu and exclusively dark chocolate to make vegan truffles. I bet my friend Marietta has a great recipe for raw vegan chocolate truffles. Now that should be tasty!

Thursday, January 8, 2009

Book Review: The Lost Ravioli Recipes of Hoboken by Laura Schenone


I have had the luxury of knowing my family history on my mother's side back to 1621 or so when, ten generations ago, Thomas Jenkins and his family arrived in Baltimore from Wales. One of my great uncles, among his many accomplishments, traced our family geneology back to his parent's native Wales and Ireland. I haven't had that good fortune on my father's side of the family. I know my great-grandparents' entrance papers from Ellis Island are somewhere in my aunt's house, so I could embark on that quest for family answers if I want to. That bug still hasn't bitten, but after reading about Laura Schenone's own personal quest for family history, I have definitely thought about it more. Overall, I enjoyed Schenone's memoir, Lost Ravioli Recipes of Hoboken. At times I found her pretentious and ungrateful for the living family members she had, but her acknowledgement of these weaknesses tempered my annoyance.


The book began with Laura making Christmas ravioli alone in her kitchen. She and her husband had chosen to forgo the big family Christmas that year. At first I found this bold decision refreshing, but the more I thought about it, the more I wondered how you can justify cutting your living family out of Christmas while you are grasping at ways to be closer to the great-great-greats that you never met and a land you've never seen. This sense of dissatisfaction with her "family of today" was even further illustrated when she scoffed at her Great Aunt Tessie's ravioli recipe because it contained cream cheese, not a traditional Italian soft cheese. However, her dissatisfaction did launch the quest for her own personal grail, without which we would not have this book.


I was intrigued by Schenone's questions about the origins of a person's predisposition towards a particular cuisine or natural setting. For example, she has a strong affinity for chestnuts and the seaside. Her Italian ancestors hail from Genoa, a coastal community rich in chestnut trees--so much that many residents make their own chestnut flour instead of spending hard-earned money on typical wheat or grain flour. Can culinary preferences or tolerance for a certain climate be programmed into your genes? These questions yield inconclusive findings, but it's great food for thought, especailly for this evolution-loving girl.


At times the book was saved by the majestic, delicious descriptions of Northern Italy and its generous, hospitable people. More redeeming qualities include further explanations of Schenone's relations with her immediate family and eventual reconcilliations. The narrative's flaws were not enough to keep this reader away, and they even taught me a lesson. If you feel like you are missing something in your life or your family, you are probably not going to find it halfway around the world with people you've never met.