Showing posts with label recipe. Show all posts

Monday, March 25, 2013

Cauliflower Pizza Crust


I've been gluten free for about 18 months now, and there are very few gluten-filled foods that I miss.  Pasta?  Never liked it.  Bagels?  Feels like lead in my stomach now.  Bread?  Well, ok I miss some kinds of bread.  But pizza?  I have never tried to deny my love for pizza.  The truth is, gluten free versions can never come close to that crisp on the bottom but doughy as you bite in and pull the slice away from your mouth sensation that good brick oven pizza brings into your life.  

I love choosing my toppings and enjoying a taste of each in every bite.  

Pizza can be casual or cozy. 

It is one of the most comforting one-dish meals.  

And it can also be one of the most unhealthy indulgences.

Never having mastered a good gluten free flour-based crust, I decided to try a cauliflower version, and I have to say I am in love with the results!  This is all fresh, made from scratch, and took me less than an hour from the moment I stepped into the kitchen to the moment I took my first bite.

Cauliflower Pizza Crust

yield 4 servings

Ingredients:

about 1/2 head of cauliflower
1 egg, beaten
1 cup grated Parmesan cheese
2 tsp basil or Italian seasoning

Procedure:
1.  Preheat the oven to 400 degrees and prepare your baking sheet.  I used a cookie sheet lined with parchment paper, but you may also use a pizza stone or a well-greased cookie sheet.
2.  Rice the cauliflower and then steam in the microwave for 8 minutes.  To rice, pulse the cauliflower in a food processor or a blender until it resembles the size and texture of grains of rice.  Option for microwave free cooking: Steam cauliflower florets in a steamer basket first, then rice them.  If you choose to steam first be mindful that you don't overprocess the cauliflower as it will rice more quickly.
3.  Mix the cooked riced cauliflower with the other ingredients in a large bowl.  The mixture should stick together a bit but will not come together like a traditional dough.
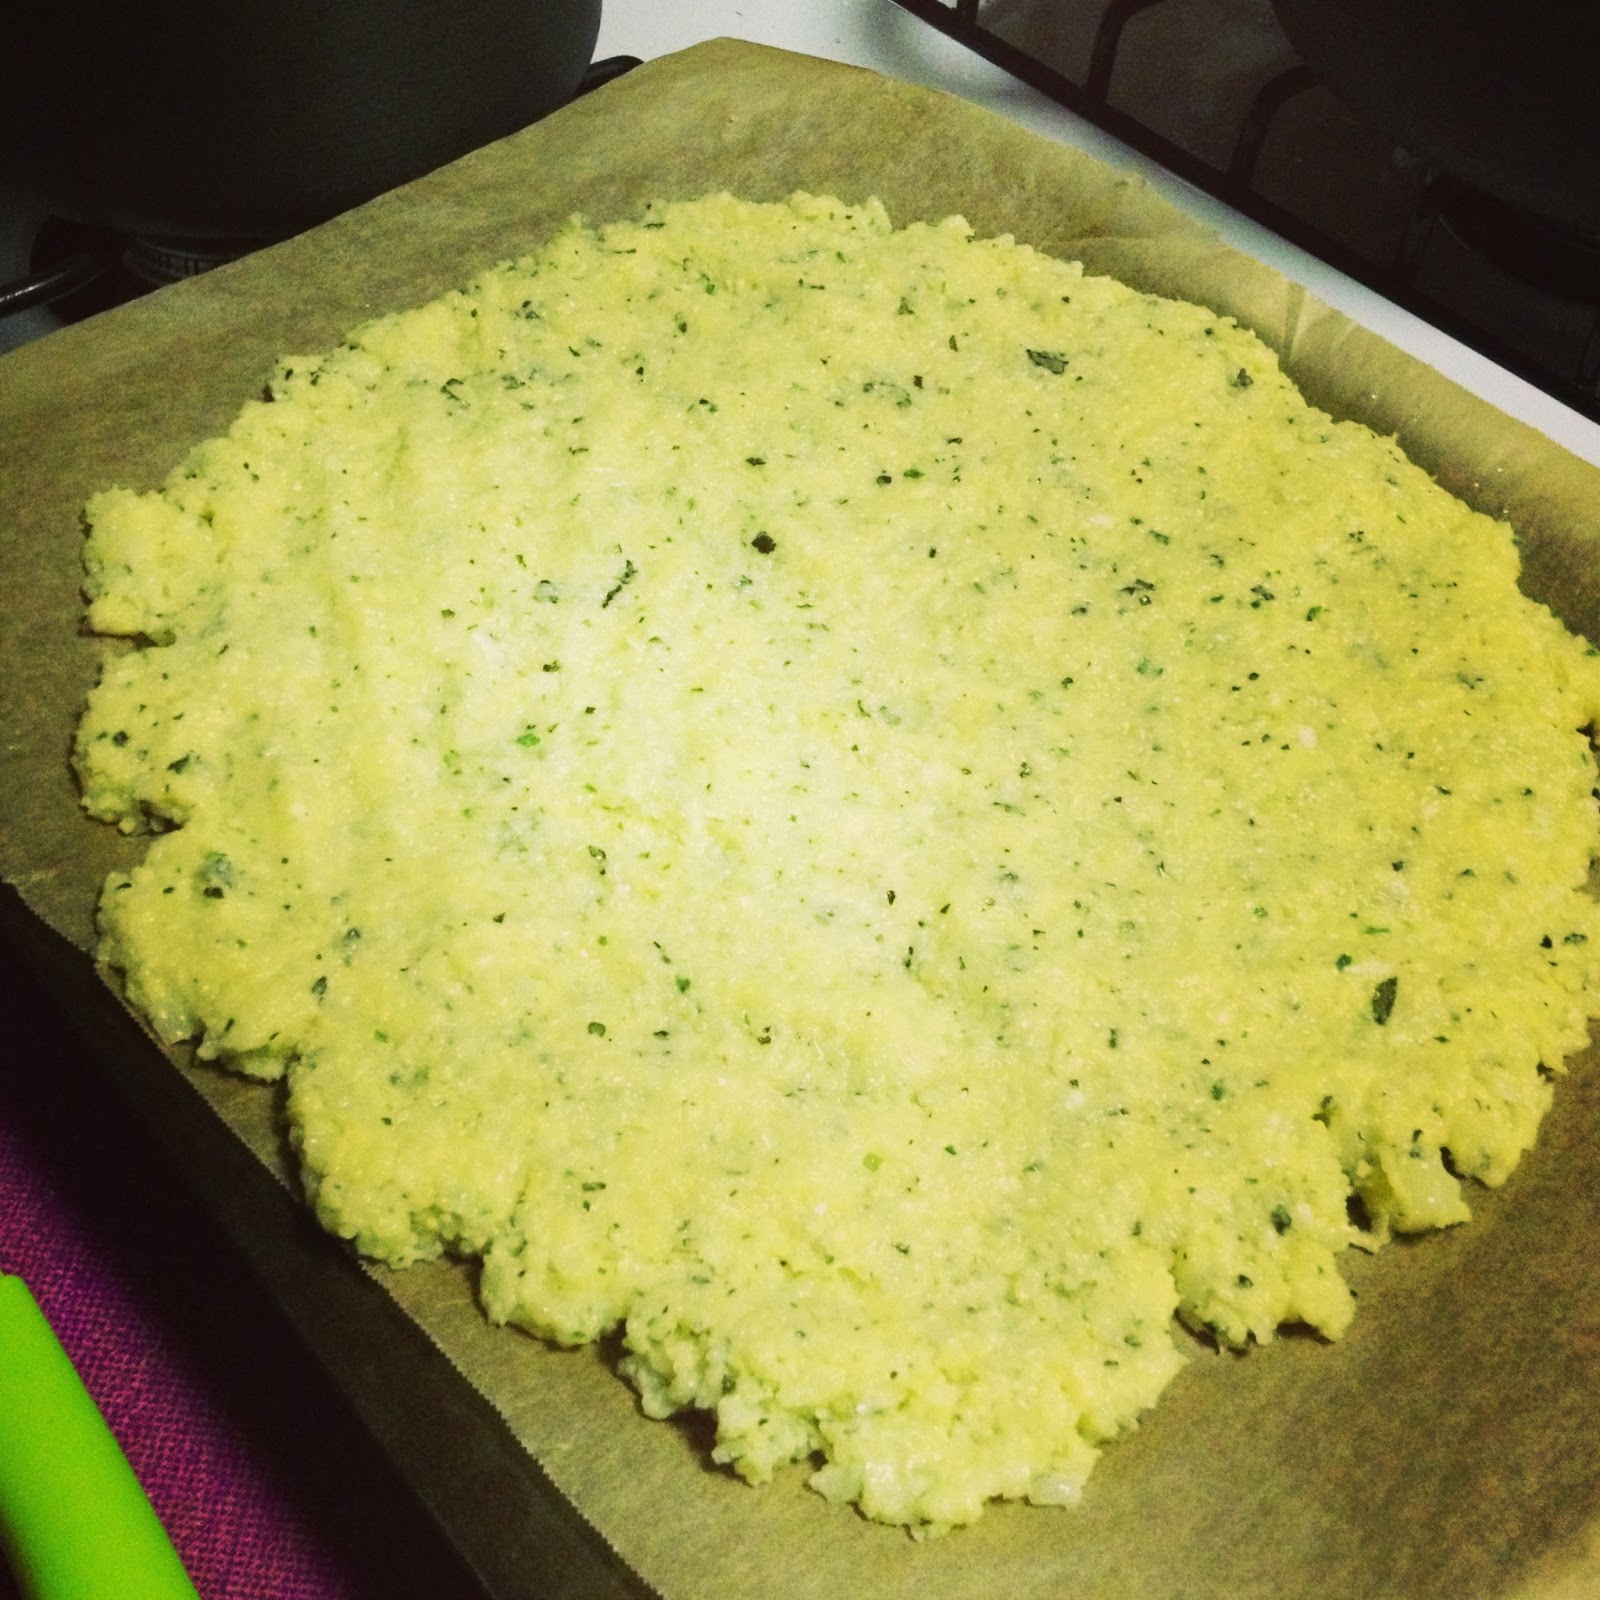
4.  Place the crust mixture onto the baking sheet and form into a pizza shape, about 1/4-1/2 inch thick.
5.  Bake for 25-30 min until golden brown.
6.  Remove crust from oven and add your toppings.  Return pizza to the oven and heat until cheese is melted and toppings are heated through or browned, about 5 minutes.
A note on toppings:  Remember that this crust is not as gluey and sticky as a traditional pizza crust, so choose lighter toppings.  You will not need much cheese due to the Parmesan in the crust.  You may wish to choose toppings that are already cooked or require less cooking time because they will only be in the oven for a few minutes.  I chose a homemade tomato sauce, mixed greens, black olives, and a little fresh mozzarella. 

Enjoy your gluten and grain free pizza!

Wednesday, October 24, 2012

Gluten Free Banana Peanut Butter Cupcake Win!


When you look at this photo, you may think, "Hmm, it looks like that frosting was just slapped onto those poor cupcakes."


If you thought that you would be correct.  I don't believe in skimping on frosting, and these batches were especially thick and delicious.

Yesterday I posted about improv cooking, which is a show that frequently plays in my kitchen.  More often than not, it gets rave reviews.  Improv baking, on the other hand, is a much more dangerous game.  However, it is a game from which I will never back down.  You see, like most creative individuals, I often have a very specific picture in my head of what I want to achieve, but quite a nebulous plan to achieve my desired result. I'm rarely satisfied with any one recipe I can find, so I simply improvise.  I have been improvising more and more since going gluten free, and my successes are so very sweet.  Like this one:  Banana Peanut Butter Cupcakes!  There's chocolate cupcake in the picture too, but we won't mention those.  I actually followed a recipe for them and was not thrilled with the result.  Banana Peanut Butter though, OMG.  I could die right now.

I should mention that I did not make these cupcakes purely for my own pleasure.  My little sister turned 22 this weekend, and she decided to celebrate her birthday by running the Atlantic City Marathon.  She finished in just over four hours (4:02) and placed 19th in her age class.  A performance like that surely deserves some protein and potassium in the form of a delicious miniature cake.  Don't you agree?

Here's what I made for her (more or less)

Banana Peanut Butter Cupcakes
makes 12 cupcakes

2 cups all purpose gluten free flour (I like Bob's Red Mill)
2 tsp baking powder
1/4 tsp baking soda
1/4 tsp guar gum
2/3 cup sugar
2 mashed bananas
1/4 cup applesauce
1/2 - 1 cup peanut butter (sorry, I did not measure.  It was probably closer to a cup)
1/2 cup hot water

Wisk together dry ingredients.  Mix in wet ingredients and beat until smooth.  Fill a lined cupcake tin and bake at 325 degrees for 22 minutes.  Perfection.

Oh, what's that?  You noticed that these cupcakes are vegan?  Yes, yes they are.

Hmm?  What did you say?  That's right.  The only fat comes from the peanut butter.

And yes, they have a fabulous moist crumb.  Honestly, if I did not know they were gluten free I would never have guessed.  My sweets-spurning boyfriend even ate two.

Now vegan frosting?  No,  no, that will not happen in my kitchen.  I have tried to make vegan buttercream with coconut oil, and it was a total bust.  I love coconut oil in other things, but not on top of my cupcakes.  I frosted half of these with a cinnamon honey buttercream and the other half with a dark chocolate buttercream.  Sorry, no real recipe for those.  Buttercream is stupidly simple:  beat a bit of confectioner's sugar and  your flavoring into a softened stick of butter.  Continue to beat and slowly add sugar until your mixture tastes like frosting instead of butter.  Done.  No excuses to ruin these babies with canned frosting.  Happy Birthday and Congratulations on your awesome marathon time, Sarah!

Monday, October 22, 2012

Improv Soup: Loaded Baked Potato

I am somewhat of an improvisational cook.  Sometimes this results in amazing, one-of-a-kind meals, and sometimes it results in somewhat of a failure.  Some soothsayers may say that nothing I cook is a fail, but case in point of a less than successful dish was last week's Sunday dinner.    I was pretty tired after my long day in the kitchen, and I may have made some shortcuts that didn't pay off when making cornmeal-breaded chicken tenders and buffalo dipping sauce.  My sweet boyfriend ate it anyway, but his confused tone when he asked, "So what is in this breading?" was a clear tip off that it was not tasty.
Anyway, this Sunday's foray in the kitchen was much more successful, and for once I remember what I did to construct such a lovely meal!


After two entire weeks of more acid reflux than anyone should ever experience (no more coffee for me!) I was craving simple yet tasty foods, so a potato soup came to mind.  However, my usual potato soup is pretty acidic with vinegar and mustard to spice it up.  Not feeling an acidic dish, I decided to try a loaded baked potato soup without making another trip to the store.  I threw all of this into my crock pot:

Loaded Baked Potato Soup
serves 6-8

5 Yukon Gold potatoes, diced
3 cups chicken broth
2 cups almond milk (any milk or milk substitute would work)
1 cup cheddar cheese
1/2 cup butter (had I used actual dairy or a milk with a higher fat content I would have reduced the amount of butter)
onion powder (an actual diced onion would be fab, but I didn't have one)
1 clove garlic, crushed
dried chives
black pepper
salt to taste

I set the slow cooker on low and left it for about 6 hours.  Then I used an immersion blender to blend most of the soup, leaving some chunks of potato.  Next I cooked about a half pound of bacon in the oven (425 degrees for 15 min--thank you pinterest!)  and diced it after it cooled.  Once I stirred in the diced bacon and a little bit of bacon fat, dinner was ready!  Instead of unconvincingly reassuring comments and quizzical looks, this time my boyfriend said something along the lines of "This soup is bangin'!  You nailed it!" (This was not a direct apology for threatening to put me back into the binder of women when dinner was not ready promptly at five, but I chose to take it as an indirect apology ;-)) With a nice texture and bacon in every bite of the soup, I had to agree--I nailed it.  Even my mostly vegetarian sister had some...although she had just run a marathon.

Albeit delicious, this is NOT shaping up to be a low fat week.  Tomorrow I'll tell you about the gluten free peanut butter banana cupcakes I engineered!  Perfect for marathon recovery, don't you think?